ClientTrack User Containers for Programmatic Access to Exported Files (transfer files to external SFTP, endpoint, cloud storage, etc.)
How to automate the transfer of an export to an external destination with a ClientTrack User Container & Microsoft Power Automate
Table of Contents
ClientTrack enables users to create their own cloud storage container to temporarily store files that they export and make them easily accessible to an external app with webhooks and API access.
These features enable users without API development skills to set up automatic ‘flows’ in a no-code tool like Microsoft Power Automate (MPA) to transfer files from ClientTrack to an external location (e.g., SFTP, OneDrive, SharePoint, API endpoint, etc.). Users with API development skills can connect their own apps to their ClientTrack User's storage container for programmatic access.
This article will show you how to leverage the new ClientTrack features and MPA to automatically transfer files that you export from ClientTrack and will cover technical details about the features so you can evaluate other potential integration approaches and use cases.

Overview
ClientTrack enables users to create a user-specific Storage Container in a Microsoft Azure Storage Account to temporarily hold a copy of the csv, xml, and zip files that they export from ClientTrack (files are retained for 30-days).
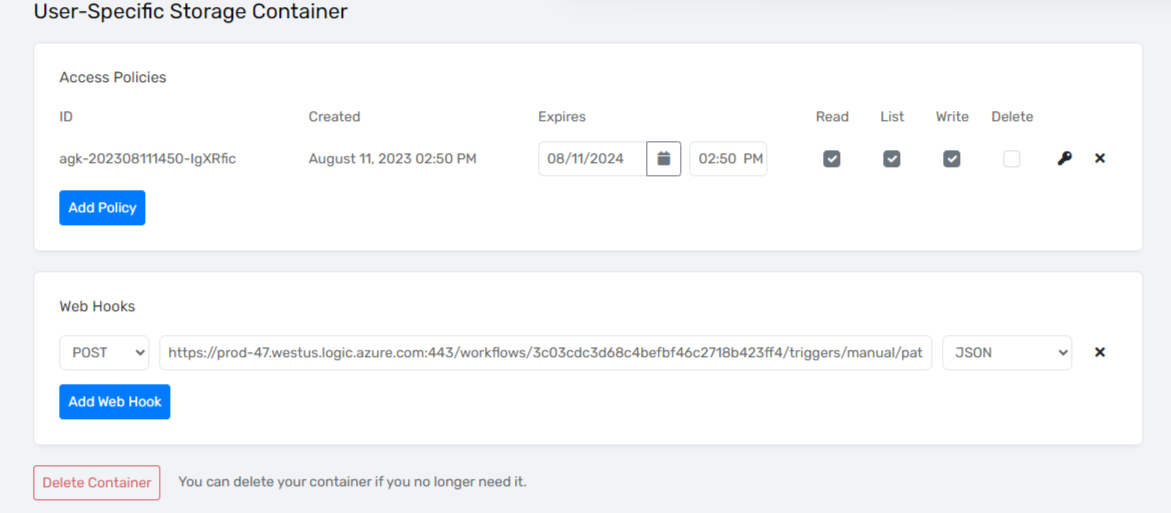
The ClientTrack user can configure access policies for their Container with read/list/write/delete permissions and expiration dates and generate a SAS Token for each that will be used to Authorize web requests to Microsoft's Get Blob API service.
Web hook URLs can be specified in ClientTrack so that ClientTrack will send the name of the exported file to the URL(s) when created in the Container.
These features can be used in combination with a no-code tool like MPA or with a code-based approach to get file contents from the Container and to transfer the file elsewhere upon export from ClientTrack (or to trigger some other action in a flow when a webhook is received).
Requirements
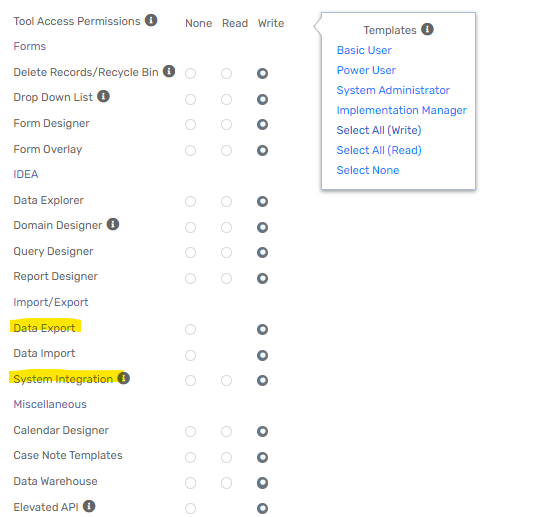
- To create a User-Specific Storage Container in ClientTrack, your ClientTrack user must have Write access to the “System Integration” and “Data Export” Tool Access Permission
- To design a Flow using Microsoft Power Automate, you must have a Microsoft Power Automate license (https://powerautomate.microsoft.com/en-us/pricing/). You can consider other tools/approaches to integrate with your container if they can trigger and listen for HTTP requests.
- Note: as of 10/2023, you must have access to the “Premium” connectors because there are no standard connectors that leverage Azure Blob Containers with SAS Token Authentication nor that can trigger a flow when an HTTP request is received.
Background
Organizations that use ClientTrack have commonly requested the ability to transfer files from ClientTrack to external SFTP folders or other destinations to increase interoperability with data warehouses or other software apps being used by different organizations in a community or network. Depending on the organization, the file may be a zip file containing the standard HUD HMIS csv set, it may be some other standard file export, or it may be a custom file that is intended for a specific use case.
Eccovia has some experience developing functionality to integrate ClientTrack with specific external applications for specific use cases that involve transferring csv, xml, and zip files from ClientTrack to another destination or endpoint, and the variety of challenges that surfaced throughout those experiences have inspired a solution approach that enables ClientTrack users with permission to be self-sufficient in establishing file transfer integrations.
This approach should eliminate unnecessary coordination during the establishment and maintenance of file transfer integrations while giving more power to ClientTrack users that want to design integrations using some of Microsoft's tools. The new ClientTrack features in conjunction with Microsoft's tools should provide ultimate flexibility for file transfer integrations.
Setting up a User-Specific Storage Container in ClientTrack
- After signing in to a ClientTrack environment, a user with permission can navigate from the ClientTrack Home Workspace Menu under Global Administration > System Integration to access the page to create a User-Specific Storage Container
- Note that the following URL can alternatively be entered after signing in to access the same page if your use has permission https://clienttrack.eccovia.com/integration/user-container

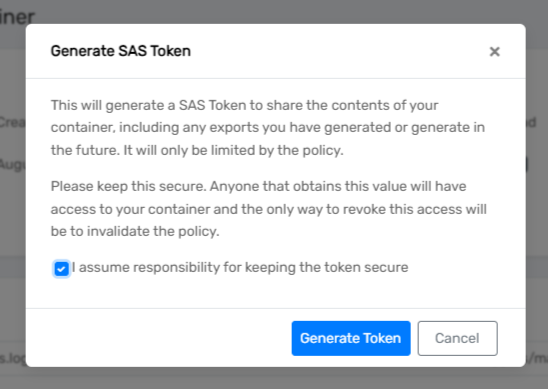
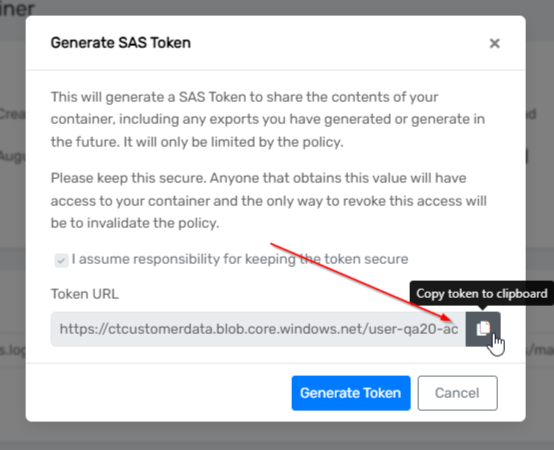
- After creating a User-Specific Storage Container, you can add one or more Access Policies with optional Expiration dates and Read/List/Write/Delete permissions. For each Access Policy, you may click the key button to generate a SAS Token, which can be used to programmatically access the files in the user-specific Storage Container.

- When Generating a SAS Token, you must first attest to keeping the token secure because the Token can be used to programmatically access files that your user exports, which could contain sensitive data. After generating the token, copy it for use when executing API requests using Microsoft's Get Blob API service to authenticate access to the Container.
DO NOT Share your SAS Token
Anyone can use this SAS Token to access the Azure Cloud Container that contains the files that you export from ClientTrack, so you are responsible for ensuring that no-one else can access a SAS Token for your Container. Delete the Access Policy if you suspect a potential breach of a SAS Token.
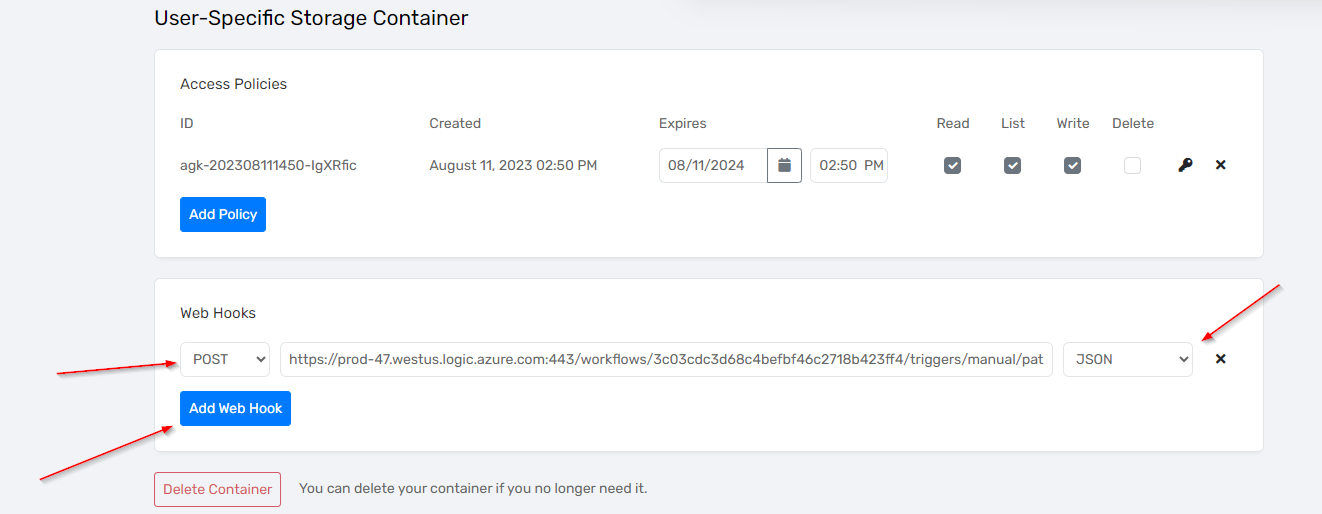
- If you want to add one or more Web Hooks (so that a web request will be executed when a file is created in the Container), you can specify a POST/PUT/GET verb, a URL, and content type (JSON or URL-encoded data). The Container and File names are formatted based on the selected content type.
- For the examples in this article, we will select POST for the request type, JSON for the content type, and will specify the URL that is generated by the MPA Trigger.
Creating a Microsoft Power Automate Flow that uses the ClientTrack User Container Feature
MPA offers a no-code approach for an individual to design a flow that will make use of a ClientTrack User's Azure Storage Container SAS Token and the Web Hook that can be created in ClientTrack.
While there are other ways to use HTTP requests and the ClientTrack features to programmatically transfer files that are exported from ClientTrack, MPA has Premium Triggers and Actions that make this easy for an individual without programming skills.
The Microsoft Power Automate Flow will consist of the following high-level steps:
- The flow is triggered when an HTTP request is received (from ClientTrack) at the URL that Microsoft Power Automate's Trigger generates
- The JSON content from the ClientTrack HTTP request is parsed so that file name or container name can be used as a dynamic value within subsequent steps
- MPA's HTTP Action is used to construct a Get Request to get the file content using Microsoft's Get Blob service
- the file name from the ClientTrack Web Hook request is dynamically populated in the HTTP URI
- An MPA Action is used to create a file in an external location (e.g., Create file in an SFTP - SSH location, create a file in OneDrive, etc.)
Create an Instant Cloud Flow when an HTTP Request is received
- Create a new “Instant cloud flow”

- Name the flow and select the “When an HTTP Request is received” Trigger

- Note the HTTP POST URL will be generated after saving the flow, and adding a New step is necessary before the flow can be saved, so click New Step.

- Choose the HTTP Action

- After successfully saving, expand the settings for the Trigger and add Request Body JSON Schema like the below screenshot (copy/paste the JSON text included under this step). Then copy the HTTP Post URL that was generated by MPA and paste it in ClientTrack when Adding a Web Hook (don't forget to Save).
- note: adding the JSON schema allows for the container or file name to be dynamically referenced in other MPA steps


{
    "type": "object",
    "properties": {
        "container": {
            "type": "string"
        },
        "file": {
            "type": "string"
        }
    }
}- Configure the HTTP action to use the GET Method, paste the SAS Token URL from ClientTrack into the MPA URI field, and click into the URI field before the question mark delimiter to insert a dynamic field for “file”
- this formatted URI including the SAS token should comply with the request requirements for Microsoft's Get Blob API service.


- Note, you may consider whether you want this flow to execute for all files or only for certain files, in which case you could add a Condition step that uses the contents of the file name to conditionally execute

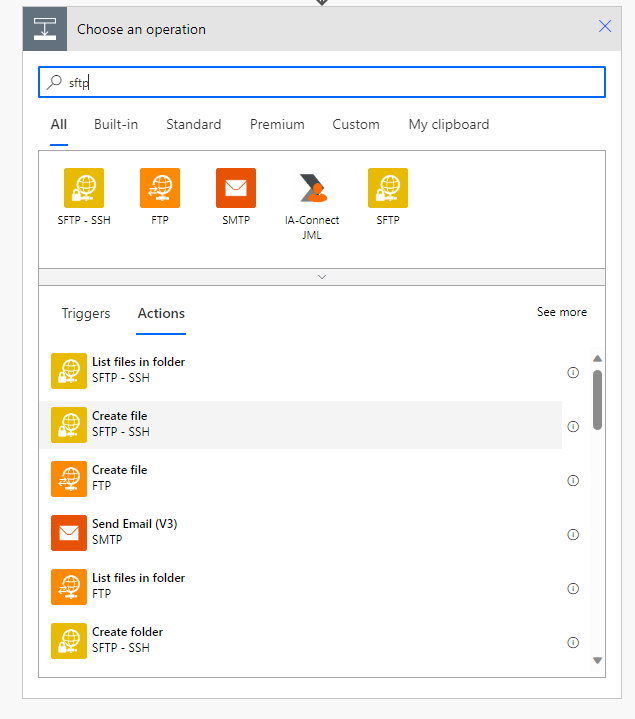
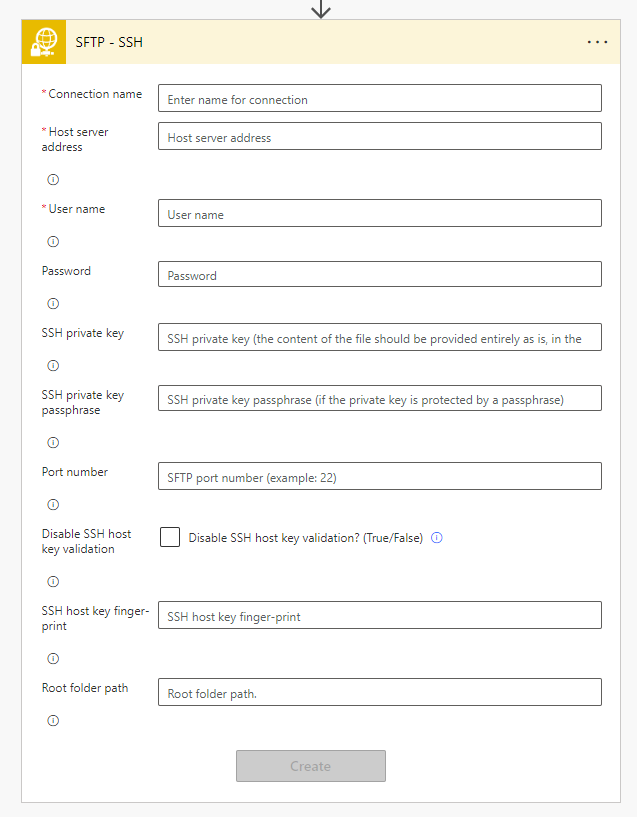
- Add a New Step to create a file in an external destination. MPA has a variety of connectors that can be used, but Eccovia is often asked to use an SFTP, so the below Action could be used to configure the destination.
- Note that you can use OneDrive, Gmail, or Outlook Actions to test your Flow before connecting to an SFTP if you want to confirm the file is successfully retrieved and transferred when you trigger an export from ClientTrack.
