Contact Us

If you still have questions or prefer to get help directly from an agent, please submit a request.
We’ll get back to you as soon as possible.

Please fill out the contact form below and we will reply as soon as possible.

  • Contact Us
  • Log in
  • Home
  • ClientTrack
  • ClientTrack Admin Guide

Adding New Verification Items

Document Check Management

Written by April Lockett

Updated at September 28th, 2023

Contact Us

If you still have questions or prefer to get help directly from an agent, please submit a request.
We’ll get back to you as soon as possible.

Please fill out the contact form below and we will reply as soon as possible.

  • ClientTrack
    ClientTrack Admin Guide HMIS Refugee Resettlement Co-Responder Reports Configuration Guides Design Rights Training Resources
+ More
  • On the Document Verification Items form, select the Add New Verification Item button at the top of the form. 
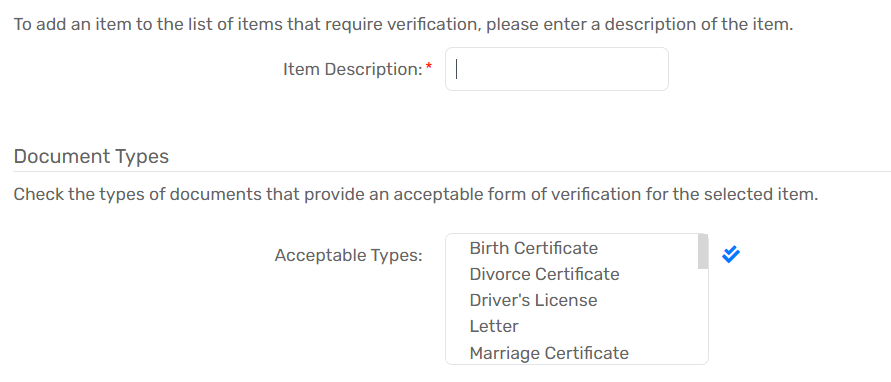
  • Enter an Item Description that will serve as the Verification Item’s title.
  • Select all applicable Acceptable Types. This is a multi-select list.
  • Select Save.


confirming verifying

Was this article helpful?

Yes
No
Give feedback about this article

Related Articles

  • Merging Duplicate Clients
  • Auto-Posting Services for a Program
  • Security Organizations
  • Adding a New Security Organization
ecco_hzt_RGB - amber_white_white, tagline
2150 W. Parkway Blvd, Suite A-101
Salt Lake City, UT 84119
Facebook-f Twitter Linkedin Instagram Youtube
© 2023 All Rights Reserved

Features

  • Reporting & Analytics
  • Case Management
  • Design Tools
  • Custom Workflows

Solutions

  • Homeless Management
  • Victim Services Providers
  • Refugee Resettlement
  • Food and Nutrition
  • Care Coordination
  • Whole Person Care

System

  • System Status and Maintenance

About Us

  • Eccovia's Story
  • Careers
  • Our Leadership

Social

  • Blog
  • Contact Us
  • News
  • Schedule Demo

Subscribe To Our Newsletter


Knowledge Base Software powered by Helpjuice

Expand