Client Administration
ClientTrack System Administration Guide
Table of Contents

System Administrators have access to certain features that will allow them to manage client records. These features are detailed in the following walk-throughs.
Client Security Model Basics
Client Security Model Basics
Two Record Types in ClientTrack
- Entity Record Data: Most commonly associated with Client Records in ClientTrack, Entity Record Data for Clients can include name, birthdate, address, SSN, and other demographic fields.
- Transactional Record Data: These include all interactions or data collection associated with the Entity. For Clients, that means assessments, case notes, services, enrollments, etc.
| Please Note: Ownership of Record Data in ClientTrack is determined by the Organization that created the Entity or the Transaction. Every Entity and Transaction in ClientTrack is automatically stamped with the Organization’s ID that created it. |
Client Record Security
Client Record Security
Below are the three functionalities that determine how Client Record Data is shared between Organizations.
| MOU | Organization-level sharing where agencies can define sharing relationships between each other defined in formal Memorandums of Understanding (MOUs). The sharing relationship can include one-way or bi-directional sharing for a specific range of dates. |
| Release Exceptions | Allows the release of Client Record Data to be specified on a Client-by-Client basis, regardless of the Organization sharing rules. For example, two Organizations may not share data, but the Client-specific release will override this initial setting. The Release Exception is valid through a specific date. This option is more restrictive and requires a User to add Release Exceptions manually on a Client-by-Client basis. |
| Restrict Intake | Allows the restriction of the Client Record Data solely to the Organization that created the Client, regardless of any MOUs in place. |
Navigation
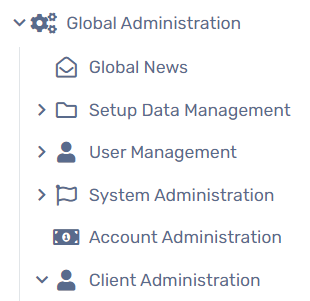
Clients are managed by going to the Home Workspace, Global Administration Menu Group, and expanding the Client Administration Menu Group.

| Please Note: Adding Clients and Transactional Data (i.e., Assessments, Services, Goals, Barriers, etc.) associated with a client are managed through the Client Workspace and covered in the ClientTrack User Guide. |
Deleting a Client
Deleting a Client
Overview
The Delete Client process allows ClientTrack Administrators to delete a client record and their related transactional records throughout the ClientTrack implementation. The Delete Client process works by updating the active status' for the client record and their related transactional records from A/Active to D/Deleted. After the Delete Client process is complete, the Client Record will no longer be accessible in ClientTrack except on the Soft Delete Process Queue.
| Please Note: ClientTrack’s Delete Clients functionality uses the soft delete method, meaning that Clients can be restored if deleted by mistake. Any Transactional Data associated with the Client will also be deleted and can be found in the functionality’s Recycle Bin if the Client is restored. |
Navigation
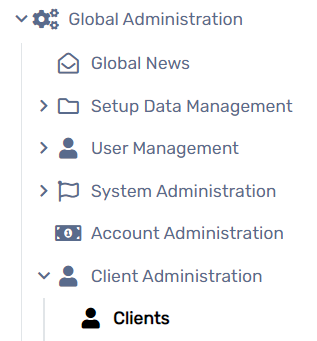
The functionality to delete a Client can be found by going to the Home Workspace, Global Administration Menu Group, expanding the Client Administration Menu Group, and selecting the Clients Menu Option.

Deleting a Client
- Use the filters to locate the necessary Client on the Client Administration search form.
- Select the Action button to the left of the Client name, followed by the Delete option to soft delete the Client.

- Select the Yes button to confirm your decision.
- The client selected for deletion will now appear in the Soft Delete Process Queue.
Soft Delete Process Queue
The Soft Delete Process Queue will display the history of Soft Deleted Client requests. The client in this queue may have been restored and therefore no longer deleted. The Soft Delete process works by updating the Active Status of the selected Client Record and all records related to the Client from ‘A’/Active to ‘D’/Deleted. Users can navigate through the various status' as a filter on the form. Depending on the status of the deletion, users may be able to re-add to the Delete Queue, remove from the Delete Queue, and select the client to review their information in the Client Workspace.
Navigation
The Soft Delete Process Queue can be found by going to the Home Workspace, Global Administration Menu Group, expanding the Client Administration Menu Group, and selecting the Soft Delete Process Queue Menu Option.

Soft Delete Process Queue Status'
- Added to Queue - The client record has been queued up for deletion, but the process has not yet begun. This status will allow users to remove the client record from the Queue if added incorrectly.
- In Process - The client record has been picked up by the Delete process procedure and is processing through all the transactional records to update the active status to ‘D’/Deleted.
- Complete - The Delete process completed and the client record is now set as ‘D’/Deleted.
- Error - The client record has been pulled into the Delete process procedure but encountered an error. The client record is not yet deleted.
System Properties
Two new system properties have been added to accompany the Soft Delete Client functionality. These system properties aim at providing end users better control over the total clients able to be deleted at one time, and how long the system should wait between a record being created and beginning the deletion process. System properties can be found within Global Administration > System Administration > System Properties
- ClientSoftDelete-BatchSize - Sets the value for the number of ClientID's to be included in each batch for soft delete.
- ClientSoftDelete-GracePeriodInMins - Sets the value for the Grace Period before the client soft deletion begins. This grace period is defined by the user and will allow the user to make any necessary changes before the deletion starts within the grace period. This grace period defaults to 120 minutes but may be updated by an administrator at any time.
User Permissions
User permissions for Delete Client can be found within User Management > Edit/Add New User > Tool Access Permissions > Feature Access
- Soft Delete Clients - Allows the user to delete any clients in the system. This permission should only be given to individuals with the highest level permissions, as a delete cannot be reversed if done incorrectly.
Note: Because this is a new user permission, users will not be granted this permission automatically. After deployment, administrators should review which users need this permission, and add it via User Management. |
Validations
There are several validations that the Delete Client process will review before completing the deletion process.
- Client cannot have an open enrollment
- Client cannot have an open housing facility check-in
- The client record cannot be part of a potential or processing merge
- The client cannot already be scheduled to be deleted
Hourly Delete Settings
The hourly Delete task can be found within Global Administration > Batch Processes > Scheduled Tasks > Hourly Soft Delete Client Processing > Edit
- By default, the soft delete process will run on an hourly basis from the hours of 6pm CT to 6am CT. These hours have been selected to avoid performance impacts during peak business hours.
- Users may update the hourly delete settings by modifying the Excluded Hours on the edit task form. Users may add additional excluded hours, or modify the existing hours selected. Any rows with a checkmark are hours that are excluding the Hourly Soft Delete task from running. To allow the Hourly delete task to run, remove the exclusion from the applicable rows.
- In order for users to edit the hourly task, users will need Data Export, Data Import, and Elevated API user permissions.
Note: Modifying the hourly delete settings is possible, but may negatively impact the async worker and performance when run during peak business hours as the task will be sequenced amongst reports, exports, and other items that are dependent on the async worker. |
Frequently Asked Questions
F.A.Q.
Q: What did the previous soft delete functionality do?
A: The soft delete functionality previously would process the real time deletion of a client record and it's related transactional data. This process had a 30 second timeout, and depending on the environment and data needing to be updated, could have performance impacts like timeouts and/or table locking.
Q: What's changed with the updated soft delete functionality?
A: The process now runs asynchronously with specific exclusionary hours (the process will run 6am - 6pm CT), similar to the Merge Client process. Updating the process to an asynchronous process mitigates the performance impacts felt in larger databases and allows the task to run continually for a given client record until all transactional records and the client record have been completely deleted. This previously wasn't possible since the process was completed on-demand, there was only a 30 second timeout.
Q: Can I restore a client record that has been deleted?
A: Yes, you can locate all (soft) deleted client records by navigating to the recycle bin on the Client Administration form. Please note, restoring the client record WILL NOT restore the transactional records that were also deleted during this process. Those records can be individually restored by navigating to the recycle bins of each item that needs to be restored.
Q: Why does restoring the client record from the recycling bin not restore the transactional records?
A: The system does not keep a log of all of the transactional records included in the delete process, only the client record and date of the deletion. If ClientTrack were to restore all records in the recycle bin for that specific client record, it may restore deleted records completed before the client record was deleted. For this reason, transactional records are not restored when a client record is restored.
Q: What will cause a record to not be deleted?
A: The client cannot have an open enrollment or be currently checked into a housing facility. If the client has either of these, the process will not be able to delete the client.
Q: Why are there exclusionary hours for when the soft delete functionality can run?
A: The goal with the exclusionary hours is to ensure optimal performance during peak business hours, 6am CT - 6pm CT. Users may update the exclusionary hours by navigating to the Home Workspace > Global Administration > Batch Processes > Scheduled Tasks. Note, users must have the correct user permissions to access the tasks form.
Q: A client record was added to the Soft Delete Process Queue but should not be deleted, what do I do?
A: Users can navigate to the Soft Delete Process Queue and remove the record from the Queue if the delete process has not begun. This situation is precisely what the system property, ClientSoftDelete-GracePeriodInMins, aims to assist with. The system property is used as a time delay from the time the Delete Client record is created to when it may be picked up with the Delete process. As an example, if the grace period is set to 60 minutes, the client record will be not be pulled into the Delete process for at least 60 minutes. This grace period allows users to review the Soft Delete Queue to remove any erroneous client records from the queue.
Merging Duplicate Clients
Merging Duplicate Clients
Overview
The Merge Client process allows ClientTrack Administrators to perform duplication and data quality clean-up throughout their environment. The Merge Client process works by merging two duplicate client records into one. This is accomplished by first updating all transactional records associated with the Source Client ID to the Target Client ID. The Merge Client process will then set the active status of the Source Client to ‘D’ or Deleted. After the Merge Client process is complete, the Source Client record should no longer have information associated to it. All transactional records can now be found under the Target Client record. To find more information about how Merge Client works and find answers to frequently asked questions, visit the Merge Client article.
| Please Note: If any transactional records are created or edited on the Source Client record during the Merge Process, the merge will loop back through to merge the still active records with the Target Client ID. |
Navigation
The functionality to merge a Client is found by going to the Home Workspace, Global Administration Menu Group, expanding the Client Administration Menu Group, and selecting the Merge Clients or Merge Multiple Duplicate Clients Menu Option.

Merge Clients
- Select the Add New button at the top of the form.
- Search for and select a Source Client and a Target Client.
| Please Note: The Source Clients transaction records will be transferred and re-associated with the Client selected in the Target Client field. The Client in the Source Client field will be soft deleted from the system once the merge is finalized. |


- Select Save.
- Once saved, the newly created merge record will appear on the Merge Clients search form.
- Select the Action button, followed by the Add to Merge Queue option to finalize the merge.

Please Note: The Add to Merge Queue button will only be visible to the user who created the merge record. |
Merging Multiple Duplicate Clients
- Select at least two of the filters and select Search.
-
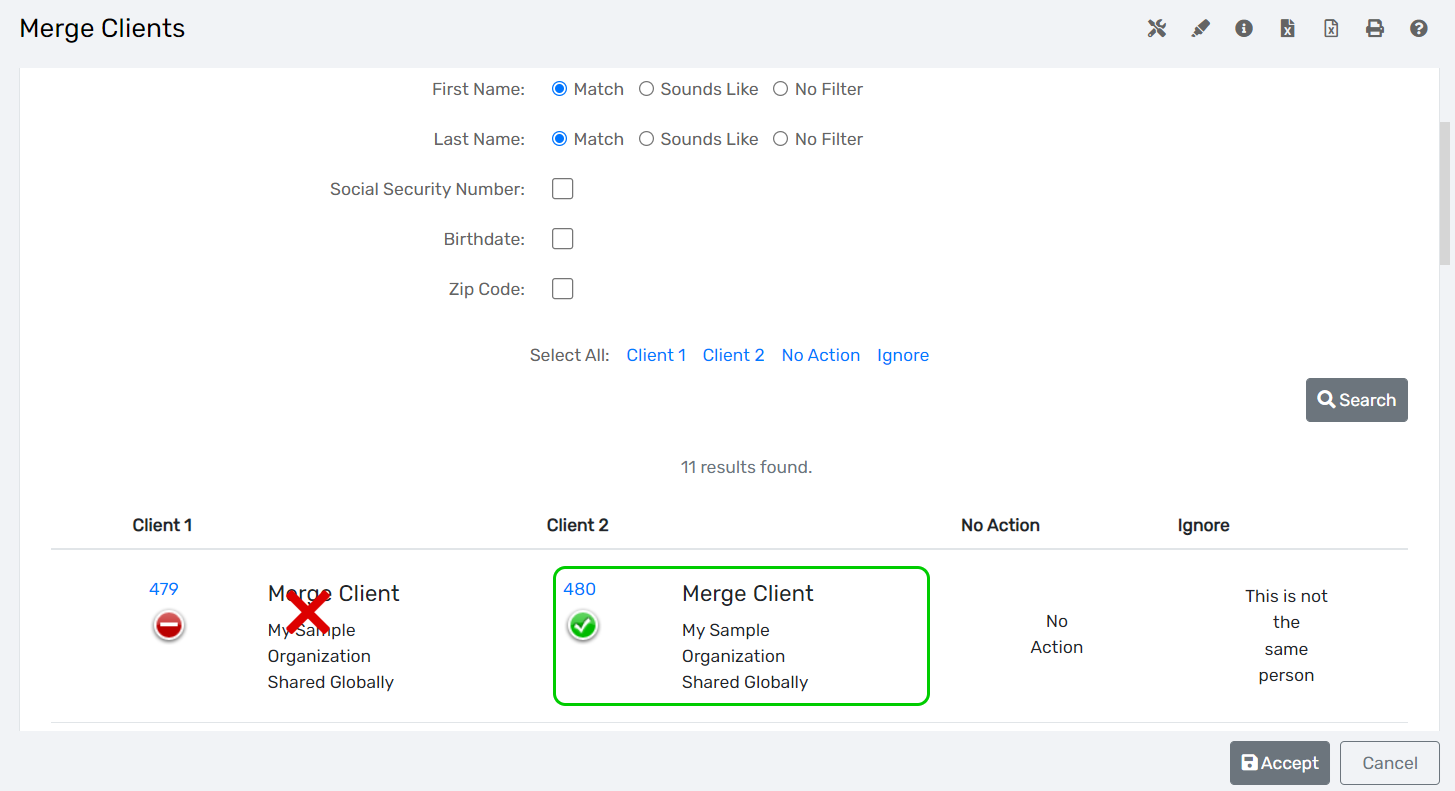
Make a selection between each client result by choosing: Client 1, Client 2, No Action, or Ignore.
- When Ignore is selected for a possible duplicate, the paring will not be visible in future searches. Users can review all Ignored duplicate pairs in the Ignored Duplicates form nested under the Merge Multiple Duplicate Clients menu option.
| Clients with a red “X” will be the Source Client and merged into the Client in green, or the Target Client |
- Repeat for each row of results.
-
Select the Accept button to perform the action selected for each row.
- Selecting Accept will add the clients to the Merge Queue to be merged when the asynchronous process begins again.

| Please Note: Selecting the Cancel button removes all of the choices on the search form. |
