
Table of Contents
Navigation
Access Path: Home > Global Administration > User Management

New users can be added by clicking Add User or Quick Add User at the top of the User Management form. The Quick Add User form is a modified version of the in-depth user setup form outlined below.
- Click Add User.
- Enter the full name of the user in the Name field, then enter their Email/Login Name.
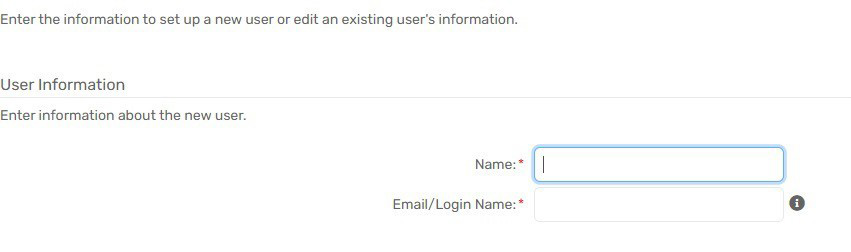
Please Note: Each email address must be unique, as this is also used for the user’s login name. |
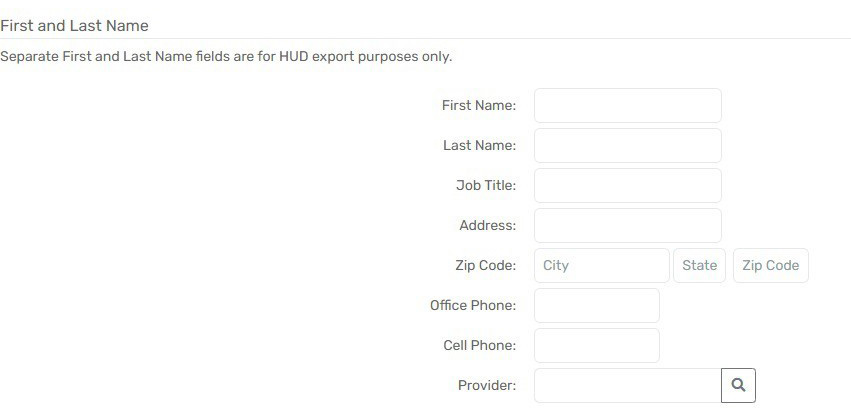
- Enter the Job Title, Address, and Phone, associated Provider, if applicable.
Associating a User to a Provider will allow certain Referral forms to preset specific Provider fields for the User.
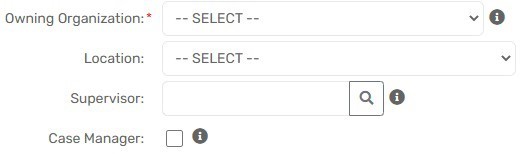
- Select the Owning Organization. Owning Organization is the primary Organization whose Client data the user will be accessing.
- The Location field is optional and used as the default location when the user signs in.
- Identify the user’s Supervisor if you wish to have the user appear on their supervisor’s My Team form.
- The Case Manager checkbox is used to indicate whether this user is listed as available for case assignments or not.
- Select the Workgroup this user will need to access. In contrast, Organizations determine which data the user can access, whereas Workgroups control what functionality the user can access.

- For a user to access their account, the Active Status must be marked as Active. Inactive or Pending will not allow the user to log in.
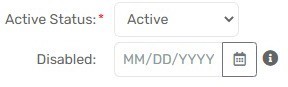
| Please Note: When a user should no longer have access to a ClientTrack instance, administrators should mark the user with an Inactive Status rather than deleting the user. Deleting a user may negatively affect any transactional or assessment data that the user may have entered or updated. |
- Complete the Tool Access Permissions for the user. More information on Tool Access Permissions can be located in the next section.
- Enter a User Password. A User Password must follow the criteria listed on the form below. The password is verified by re-typing it into the Confirm Password field.
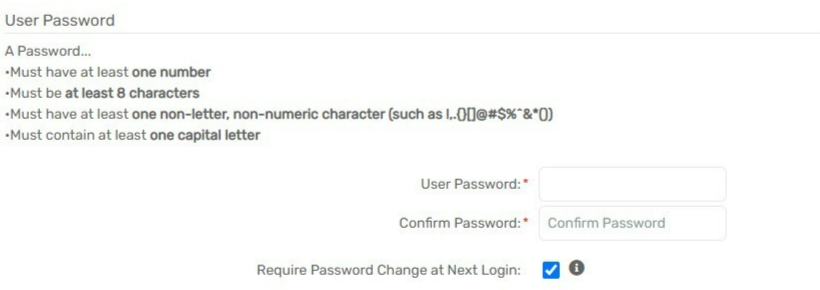
The administrator sets a generic password for the user and leaves the Require Password Change at Next Login checkbox selected.
On the user’s first log-in using the generic password, ClientTrack will prompt them to immediately change their password to one of their choosing. The only time it is not necessary to require a user to change their password is in a Training environment.
Password retrieval is accomplished using a Security Question and Answer combination. As the administrator, you can leave this field blank so that users are prompted to complete this information to activate password recovery options. While editing a user account, administrators are unable to view security answers or password information.
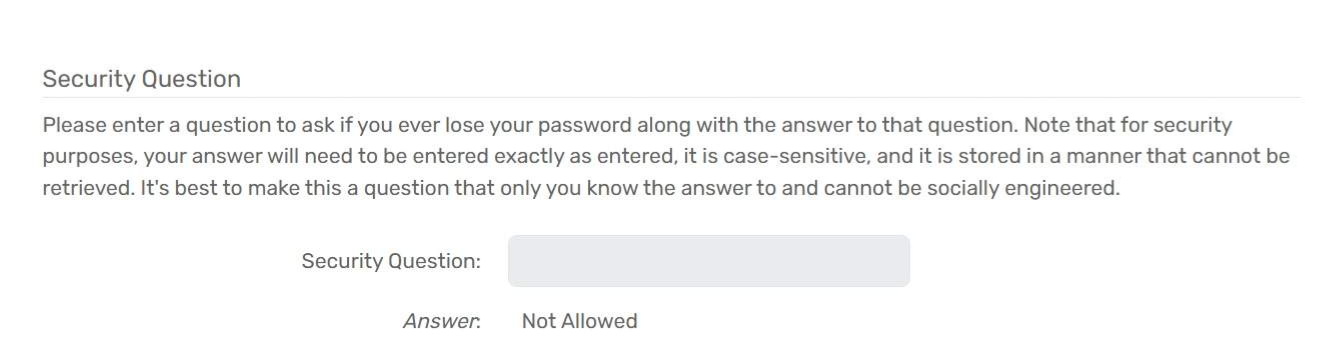
| Administrators should encourage users to complete their Security Question and Answer during their first log-in into ClientTrack. This will allow users to not be reliant on an administrator to reset their password. |
- Use the Support Issues Capability section at the bottom of the form to determine how this user can interact with the Issue System. ClientTrack includes a built-in issue support system. The options are as follows:
|
Unable to Submit Support Issues |
The user is not able to access the Issue Submission form in ClientTrack. |
|
Able to Submit Support Issues Internally |
As a best practice, most users are assigned this setting, allowing them to submit their issues, questions, and suggestions to an administrator. The administrator should attempt all known options to resolve all submitted issues and questions before submitting remaining items to the Eccovia Support Team. |
|
Able to Submit Support Issues to ClientTrack |
Users with this setting assume the role of transmitting requests directly to the Eccovia Support Team. As mentioned above, this option is best limited to administrators, who have control over which issues are authorized to be submitted to the Eccovia Support Team. |
