Security Organizations
ClientTrack System Administration Guide

Written by April Lockett
Updated at October 2nd, 2023
Table of Contents
Security Organizations control which Clients, Transactions, and Setup Data each User logged into an Organization has access to. When a User logs into an Organization, that Organization’s settings determine the visibility of Client Demographic/Transactional Data and Setup Data.
| Please Note: An Organization does not affect a User’s Interface other than changing the Setup Data seen by a User. Workgroups determine the Dashboards, Forms, Menu Groups, and Menu Options a User sees. |
Security Organizations are managed by going to the Home Workspace, Global Administration Menu Group, then Setup Data Management, and selecting Security Organizations.

Adding a New Security Organization
Adding a New Security Organization
- On the Security Organizations search form, select the Add New Security Organization button.
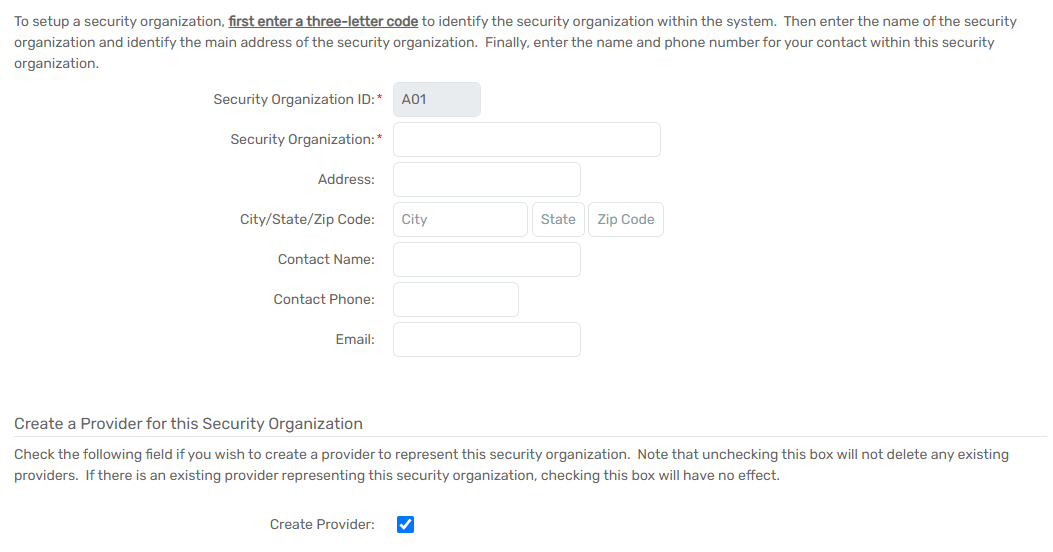
- Enter a unique, three-character code to represent this organization in the Security Organization ID field. Most instances have this field auto-generate to prevent errors.
- Enter a name in the Security Organization text box; this will serve as the Security Organization’s name in ClientTrack. Complete the Address, City/State/Zip Code, Contact Name, Contact Phone, and Email fields if necessary.
- If the Security Organization also needs a corresponding Provider created, select the checkbox next to Create Provider.
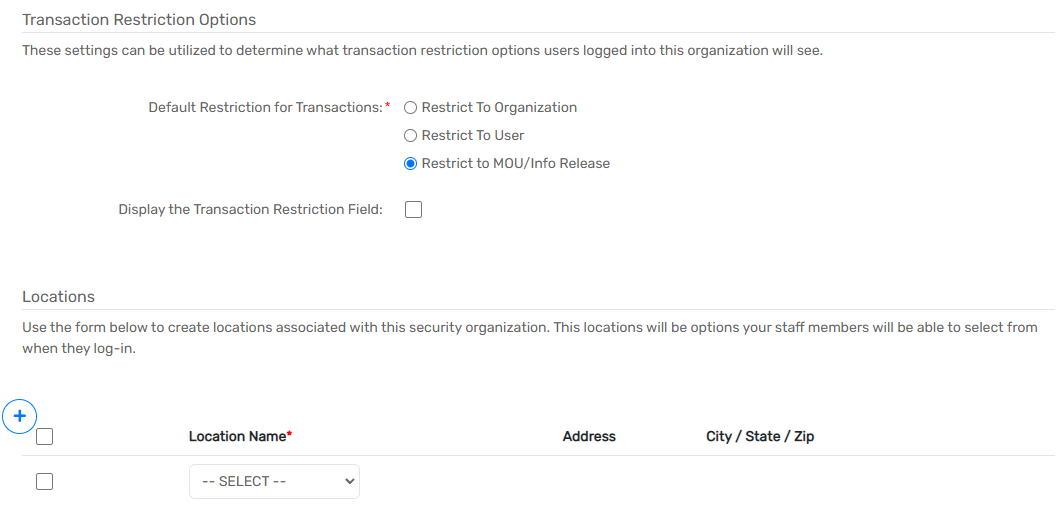
- Select the Default Restriction for Transactions and select or unselect the checkbox for the Display the Transaction Restriction Field.
| Please Note: These restriction settings can be utilized to determine what Transaction Restriction Options Users logged into this Organization will see. |
- If applicable, select Location Name(s) for the Security Organization. Locations indicate where the Security Organization is located and could also be utilized in certain forms.
- Select the Save button to save the form’s data.
Managing an Organization’s Assigned Users
Managing an Organization’s Assigned Users
Security Organization access can be controlled on a User-by-User basis using the User Management Menu Option; however, mass changes to a Security Organization’s User access are better managed through the User Access Option.
Navigation
Security Organizations are managed by going to the Home Workspace, Global Administration Menu Group, then Setup Data Management, followed by Security Organizations and selecting the Action Button next to the necessary Security Organization.
Giving a Security Organization User Access
Giving a Security Organization User Access
- Select the Action Button next to the necessary Security Organization to manage User access, followed by Assigned Users.
- Select or unselect the Login checkbox for any User who should log in and add new records as a member of this Security Organization. Select or unselect the Editable checkbox if this User should be able to edit records owned by this Security Organization. Please note these settings are independent of one another.
- Select the Save & Close button to save the form.

Information Releases/MOUs
Information Releases/MOUs
What is an Information Release/MOU in ClientTrack?
In ClientTrack, the Security Organization level sharing of data is defined by an MOU (Memorandum Of Understanding). An MOU indicates the information-sharing relationship between Security Organizations, and the sharing relationship can be one-way or bi-directional. After MOUs have been defined and set up, they can be referenced in the form for adding or editing client information. The MOU also controls information sharing for specific transactions when Unrestricted is selected as the Restriction Option.
Navigation
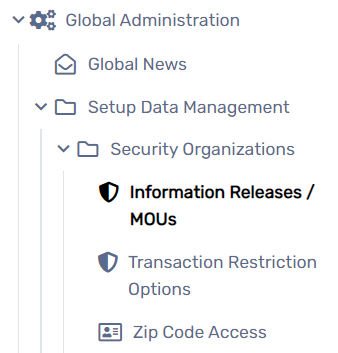
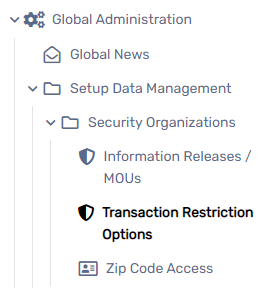
Information Releases/MOUs are managed by going to the Home Workspace, Global Administration Menu Group, then Setup Data Management, and selecting the Information Releases / MOUs Menu Option under Security Organizations.
Adding a New Information Release/MOU
- On the Information Releases / MOUs search Form, select the Add New button.
- Enter a unique number to represent this MOU in the Information Release No. field.
- Enter a name in the Information Release Name text box; this will serve as the MOU title in ClientTrack.
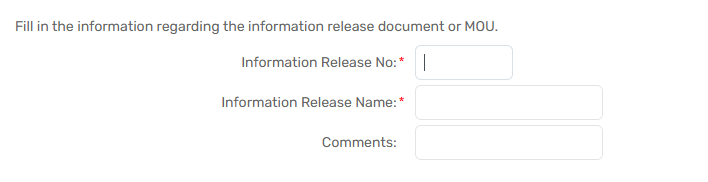
- If necessary, enter Comments.
- Select the Save button to save the Form’s data.
Transaction Restriction Options
What are Transaction Restriction Options in ClientTrack?
A Security Organization’s default security settings are determined by a User through the Transaction Restriction Options page. These settings determine which Transaction Restriction Options are visible/editable by particular Users. Utilizing these settings allows the system to handle the finer aspects of the Security Model without input from the Users.
| Please Note: If the default Transaction Restriction Options settings are not set to hide the options on transactional forms, Users will have the ability to change the sharing setting on the transaction form. |
Navigation
Transaction Restriction Options are managed by going to the Home Workspace, Global Administration Menu Group, then Setup Data Management, and selecting the Transaction Restriction Options Menu Option under Security Organizations.
Managing Transaction Restriction Options
- Navigate to the Transaction Restriction Options Form.
- Check or uncheck the checkboxes as necessary.
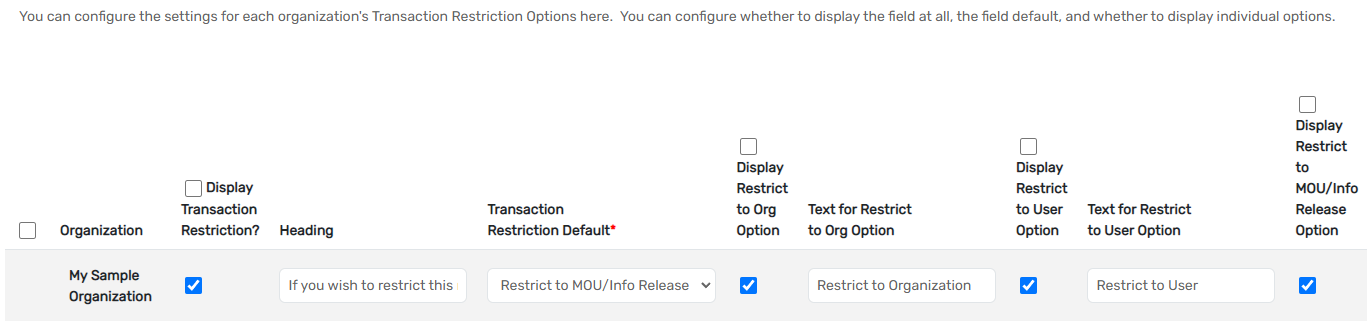
-
Select the Save & Close button to save the changes to the Form.
